With a little extra time on my hands (we keep getting snowed in), I decided to take a closer look at my Mac Command Line Interface (CLI). The Mac comes with iTerm installed, but most developers also install iTerm2. The upgrade to Mac OS X 10.15 (aka Catlina) also saw a change to the default shell from bash to zsh, so I decided to add the Oh My ZSH configuration framework to my development environment.
iTerm2
The iTerm2 terminal emulator has an amazing number of features. I’ll probably use only about 10% of what’s available. You should take the time to read over the docs to see if there are any “hidden” features that you need to start using.
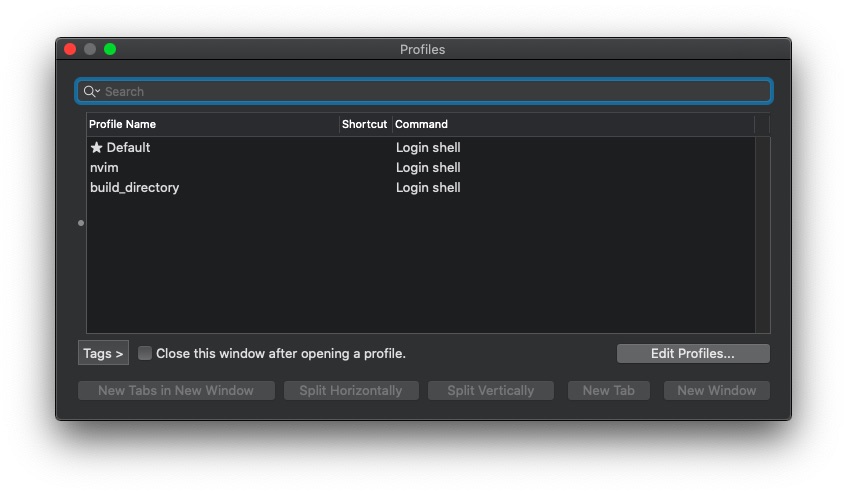
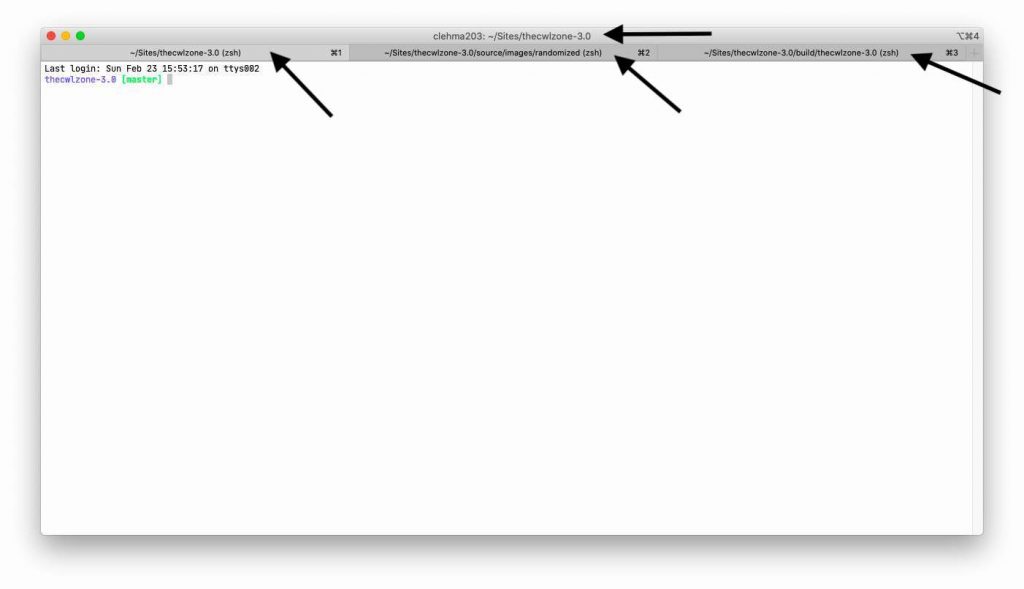
For me, the Profiles and Window Arrangement features are the most valuable. I have three Profiles: Default (standard CLI environment), nvim (the neovim text editor) and a build_directory profile that opens a new tab or window and then changes into the Middleman build directory:
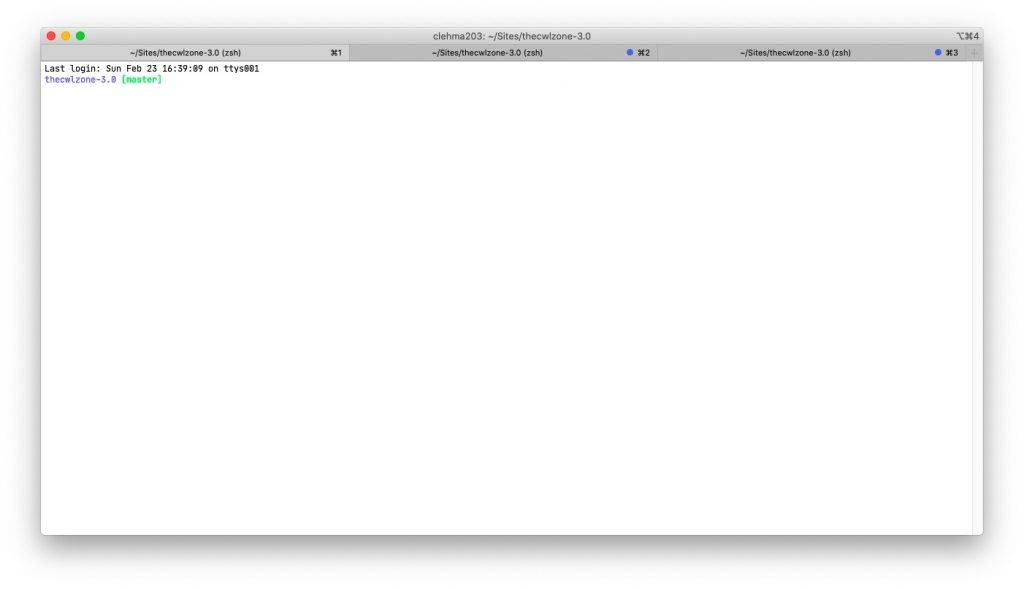
The Window Arrangement feature is pretty cool. You can set up a window, configure some tabs and then use the Window -> Save Arrangement command to save the setup and give it a name. Then you can recreate your window/tabs setup by invoking the Window -> Restore Window Environment command:

Now I have the Middleman development environment for my web site ready to go – one tab to start up the nvim editor, one tab to start the Middleman server and the third tab for generating new HTML files and for running git commits:
Oh My ZSH
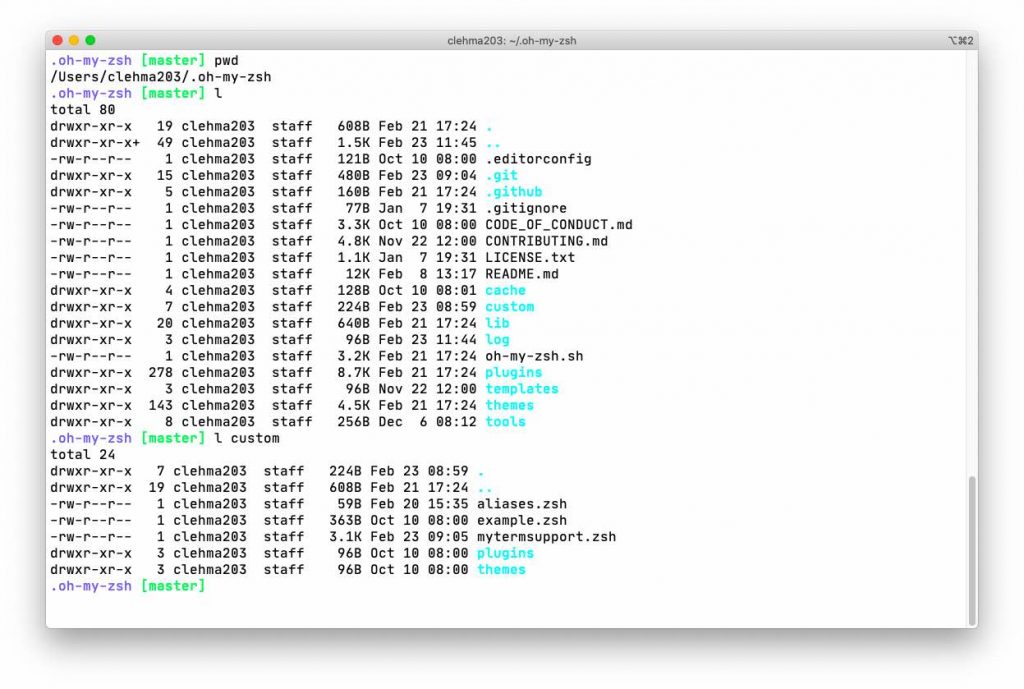
The Oh My ZSH framework looks complex, but it’s really just a group of zsh scripts in a set of directories that get installed under $HOME/.oh-my-zsh. There are a bunch of default settings in the lib directory which can be overwritten by anything you add in the custom directory. In my case, I didn’t like the default values of window and tab titles. The window title default is user_name@server_name which is non-essential for a single user that rarely needs to connect to a remote machine. The tab titles were truncated after 15 characters which seemed a bit restrictive. The values are set in the lib/termsupport.zsh file, so I made a copy of the file, put it in the custom directory and renamed it to mytermsupport.zsh.
When zsh loads, the files under lib are read first (termsupport.zsh), followed by the files in custom (mytermsupport.zsh), and that’s how you override the default values.
Here is what I needed to change in mytermsupport.zsh:
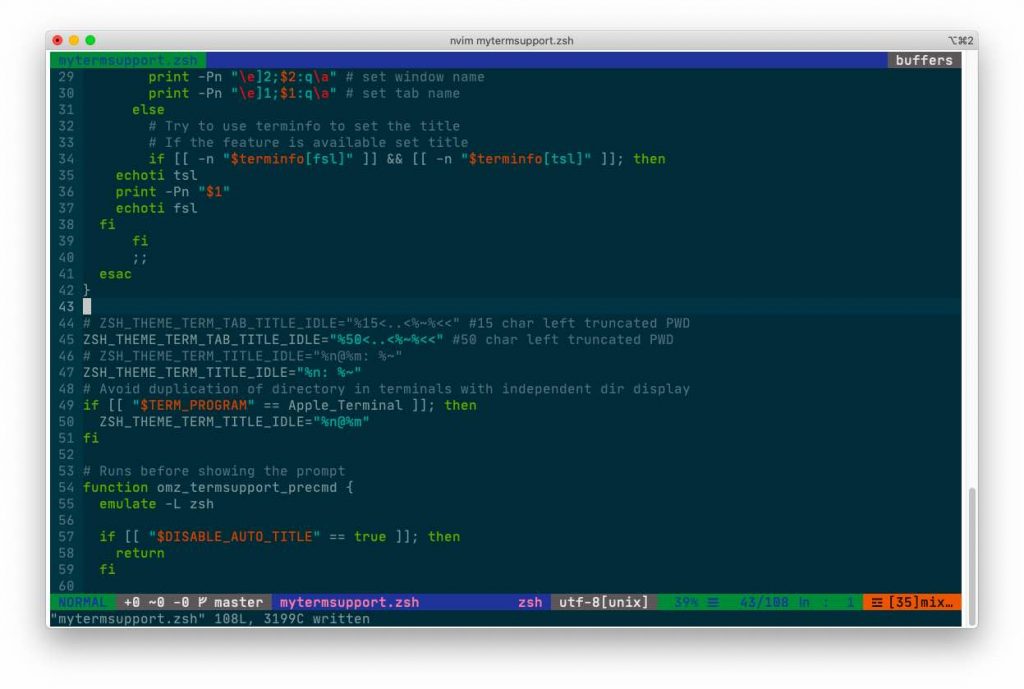
Line 45 allows 50 characters to be displayed in the tab titles, and line 47 changes the window title to display only the user name + the current directory. Now I get more informative titles in a window and its tabs.
Oh My ZSH has a lot of themes that can be used to adjust the prompts and colors in your terminal. I prefer minimalist decorations, so I have settled on the Zahnn theme.
iTerm2 Fonts
I was using the Hack font for a long time, but I have recently changed over to JetBrains Mono. iTerm2 fonts can be adjusted under the Preferences -> Profiles -> Text pane:
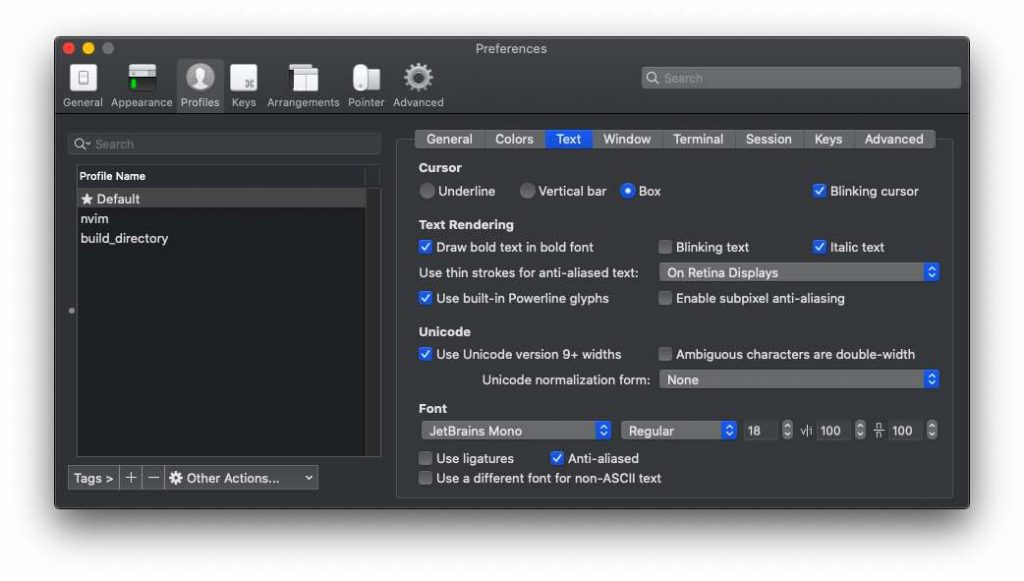
I’m an old fart, so I adjusted the font size upwards to 18, although I can use 12 points in the nvim editor profile. Both Hack and JetBrains are really easy to read, and I recommend installing one of them if you use the CLI on a regular basis.